Growing Your First Cannabis Plants: A Beginner’s Journey with Cannabiz Seed
Table of Contents
Growing your first cannabis plants can be one of the most rewarding hobbies – but if you’re a beginner, it can also feel a bit intimidating. Don’t worry! Every expert grower started right where you are now. In fact, the founders of Cannabiz Seed began as home growers who faced all the classic newbie frustrations, from dud seeds that never sprouted to plants mysteriously wilting overnight. Those early challenges and frustrations with unreliable genetics sparked a passion to make things easier for others.
In this guide, we’ll walk you through the basics of growing cannabis from seed to healthy plant. We’ll cover how to choose the right seeds, set up your growing environment, water and light your plants properly, and avoid common mistakes. Let’s grow!
Start with Quality Seeds
(& Why It Matters)
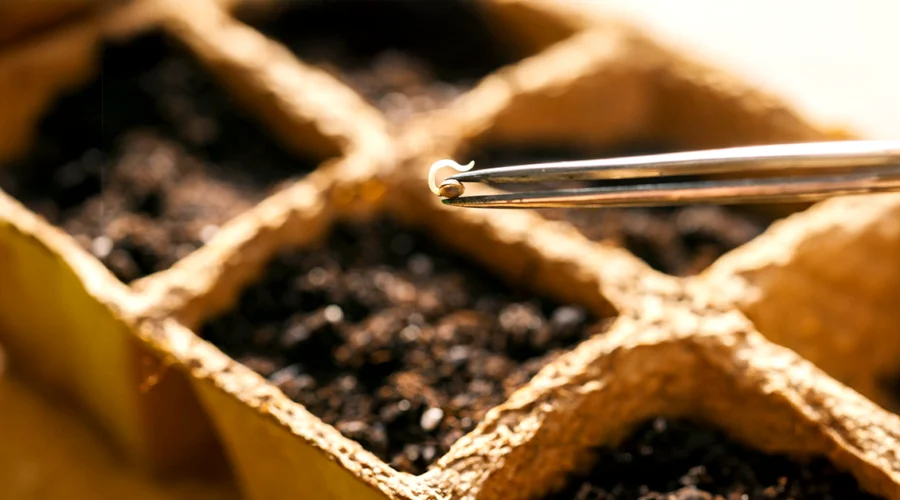
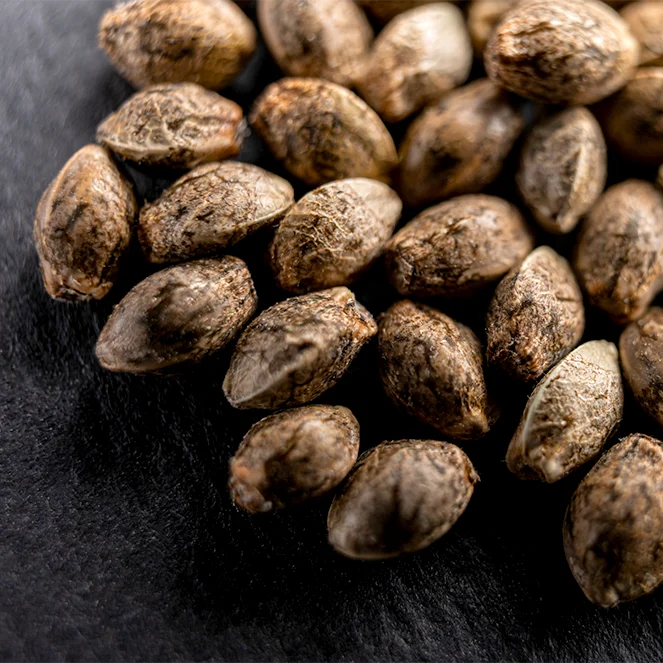
Every great cannabis plant starts with a great seed. It might be tempting to plant that random seed from the bottom of your dispensary bag, but starting with high-quality, stable genetics will save you heaps of trouble. Why is this so important for beginners? Because unstable or poor-quality seeds can lead to unpredictable results – think plants that turn hermaphrodite (producing seeds instead of buds) or inconsistent growth. Stable, tested genetics give you consistent, healthy plants, so you’re not fighting an uphill battle from day one.
Seed Types: Cannabis seeds generally come in a few different types, and knowing the difference helps you pick what’s best for your first grow:
- Feminized Seeds: These are bred to grow into female plants (which produce the buds you harvest). For beginners who want to ensure they get usable flowers, feminized seeds are a popular choice – no need to identify and remove male plants.
- Regular High THC Seeds: Regular seeds can grow into either male or female plants. They’re often used by old-school growers and breeders. If you go this route, be prepared to spot and remove male plants early, or they can pollinate females and fill your buds with seeds.
- Autoflowering Seeds: Autoflowers are great for beginners because the plants will flower on their own with age, rather than relying on light cycle changes. They tend to stay small and finish faster. The trade-off is slightly smaller yields, but the simplicity (no need to adjust light schedules) is a big plus for first-timers.
No matter which type you choose, buy from a reputable source that values genetics and quality control.
Before planting, spend a bit of time researching strain profiles as well. Some strains are more forgiving than others. Look for “beginner friendly” strains because starting with forgiving genetics sets you up for a smoother first grow.
Setting Up Your Grow Space
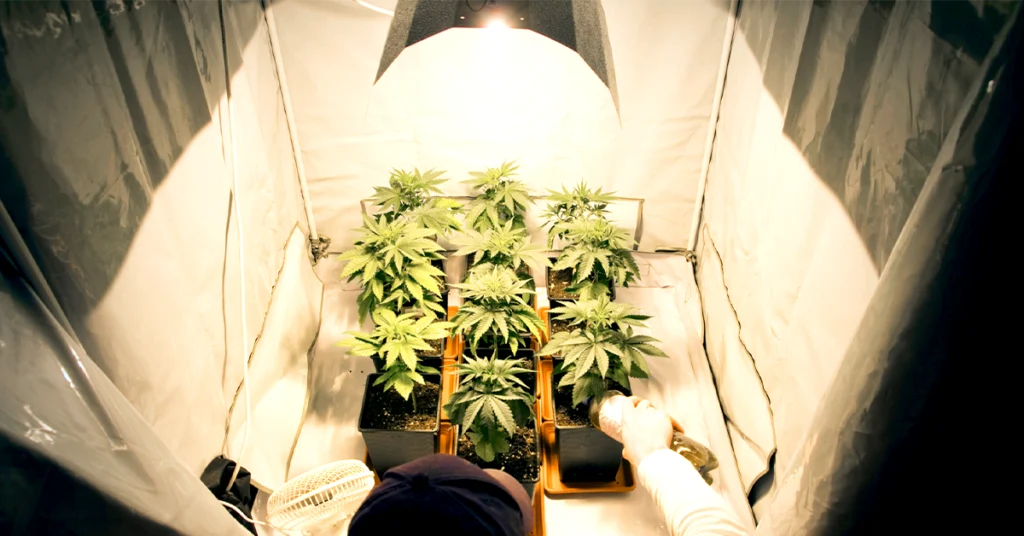
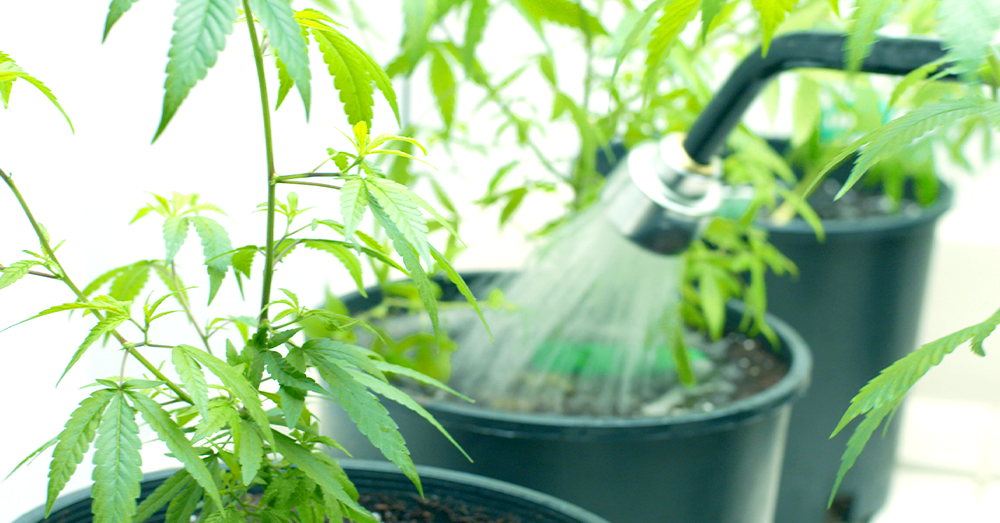
Young cannabis plants thriving in pots under proper care. Setting up your grow space properly is a crucial first step for any cannabis cultivator. As a beginner, you don’t need a fancy high-tech setup, but you do need to cover the basics of the plant’s environment. Cannabis is a hardy plant in many ways, but it thrives under specific conditions. The good news is you have options: indoors or outdoors, large or small, soil or hydroponics. Let’s break down the essentials.
Indoor vs. Outdoor: If you have a sunny backyard or balcony and it’s legal to grow outdoors in your area, nature will provide the light for free. Outdoor growing can yield great results if you have good sunlight (at least 6+ hours of direct sun a day), suitable climate, and some privacy/security. Just be aware of your local growing season – cannabis planted outdoors in spring will grow through summer and be ready to harvest in fall. Beginners often start with indoor growing for more control. Indoors, you can grow year-round and fine-tune the environment. All you need is a dedicated space like a spare room, closet, or grow tent.
Essential Environmental Factors: Whether inside or out, cannabis plants like a stable, comfortable environment. If you feel good in the space, chances are your plants will too! Key factors to monitor include:
- Temperature: Aim for a temperate range around 70–85°F (21–30°C) during the day. Too cold or too hot can slow growth or cause stress. Indoors, this might mean using a small heater in a cold basement or an AC/fan in a hot attic.
- Humidity and Airflow: Young seedlings prefer higher humidity (around 60-70%), while later stages do best around 40-50% humidity. Good airflow is a must – a simple oscillating fan can prevent stagnant air, strengthen plant stems, and deter mold. If you’re in a grow tent, make sure there’s both an inline fan to exhaust hot air and perhaps a filter to control odor. The reflective walls of a grow tent help maximize your light, and the enclosed space makes environment control easier.
- Growing Medium: For an absolute beginner, quality potting soil is the easiest medium. It provides nutrients and a buffer against mistakes. Choose a potting mix designed for cannabis or vegetables; many growers add perlite (the white sponge-like rocks) to improve drainage. Start your seeds in small pots or seedling trays, then transplant to larger containers (3–5 gallon pots are common for a full grow) once they have a few sets of true leaves. Make sure your containers have drainage holes – cannabis roots hate sitting in water.
Even as you set up your grow, think about practices like reusing soil or pots when possible, using energy-efficient LED lights (more on that next), and safe disposal of any waste. Not only is this good for the planet, it often creates a healthier grow environment (for example, reusing “super soil” that’s rich in organic matter can feed plants naturally).
Lastly, set yourself up for convenience. Place your plants somewhere easily accessible so you can tend to them daily without hassle. Growing cannabis is interactive – you’ll be checking on your plants often, adjusting conditions, and learning as you go. A well-organized grow space makes this a joy rather than a chore.
Lighting 101: Giving Your Plants the Right Light
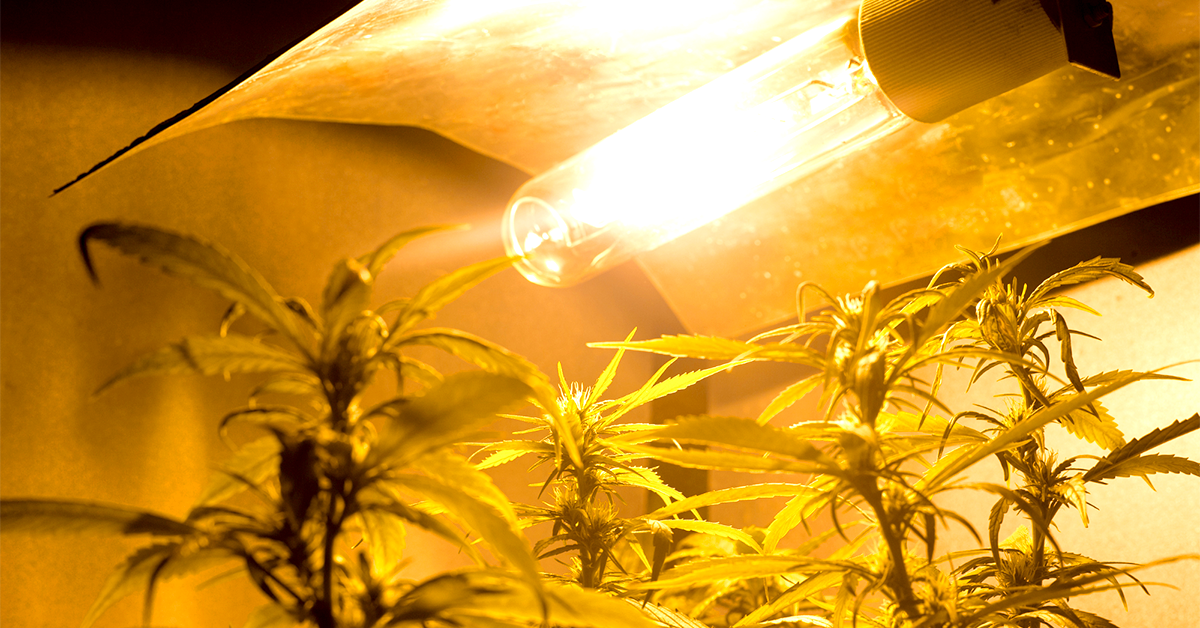
Indoor cannabis plants basking under warm grow lights. Light is the lifeblood of cannabis growth. In the wild, cannabis (especially photoperiod strains) grows through long summer days and then starts flowering as days shorten in the fall. When you grow indoors, you’ll be providing all the light with grow lamps, essentially mimicking the sun. Getting your lighting right will make the difference between a spindly, weak plant and a robust, bushy one.
Understanding Light Cycles: Cannabis has two main life stages – vegetative (growth) stage and flowering (budding) stage. Photoperiod strains (non-autoflowers) depend on the hours of light vs dark to switch stages. For vegetative growth, they need long days. Indoors, most growers give 18 hours of light and 6 hours of dark per 24-hour period during veg. This long light period tells the plant “keep growing, it’s summer!”. Once you’re ready to induce flowering, you switch to 12 hours of light and 12 hours of uninterrupted dark each day. The plant reads the longer nights as a signal to start making flowers (buds). It’s critical that the dark period is truly dark – light leaks during the 12-hour night can confuse the plant or cause stress (sometimes leading to hermaphrodite plants). If you’re using a grow tent or closet, ensure it’s light-tight for those dark hours.
Autoflowering strains, on the other hand, do not need this light cycle change – they will flower “automatically” after a certain age, thanks to their genetics (derived from Cannabis ruderalis). You can give autos a steady light schedule (many growers do 18/6 from start to finish, or even 20 hours light/4 dark). For beginners, autos simplify the lighting demands, though you’ll still want plenty of light to maximize their yield.

Choosing a Grow Light: There are a few common types of grow lights: HID (high-intensity discharge) like HPS or MH, CFLs, and LEDs. These days, LED grow lights have become very popular for home grows. They are energy-efficient, run cooler (less heat issues), and many are “full spectrum,” meaning they provide the wavelengths of light the plant needs for all stages. If you invest in an LED panel, look for one that can cover your grow space in terms of wattage and footprint. A common guideline is ~30–40 true watts of LED light per square foot of canopy for decent growth (so a 2×2 ft area might use around a 200W LED panel). Always follow the manufacturer’s hang height recommendations – too close can light-burn the plants, too far and they may stretch.
If you use HID lights (like a 400W or 600W HPS/MH system), remember they run hot. You’ll need good ventilation and possibly an air-cooled hood (as seen with the big ducting and carbon filter in the image above). HIDs are very effective but use more electricity and require more environmental control (heat, humidity) than LEDs.
For a very small micro-grow, even compact fluorescents or T5 grow tubes can work for seedlings and veg, but they often lack intensity for good flowering. Many beginners now opt for affordable LED grow light kits which come with the full setup.
Light Intensity and Distance: After you’ve chosen your lighting, pay attention to how your plants respond. A healthy plant under adequate light will be compact, with leaves reaching upward and a nice green color. If your seedlings are getting too little light, they will stretch – becoming tall, thin, and fragile. Move lights closer (carefully) or increase intensity if you see stretching. Conversely, if leaves are bleaching white or yellow at the top, or curling up (“taco” shaped leaves), your light might be too intense or too close – back it off a bit.
One great thing about being part of a community is that you can ask for help if you’re unsure. Lighting can seem complex, but with a bit of tweaking, you’ll find the sweet spot for your setup. Remember, cannabis loves light – give them as much as you can, just short of too much.
Watering and Nutrients: Feeding Your Green Babies
Watering cannabis properly is an art that you’ll quickly get the hang of. New growers often worry “How much water do my plants need?” and it’s a very important question. Both overwatering and underwatering are common mistakes that can harm your plants. The goal is to keep the growing medium moist but not waterlogged. Here are some beginner-friendly tips for watering:
- Use the Finger or Weight Test: Instead of watering on a strict schedule, check your soil. Stick your finger about an inch (2.5 cm) into the soil – if it feels dry at that depth, it’s time to water. If it’s still damp, wait a bit longer. Alternatively, lift the pot; a very light pot means the soil is dry and needs water, a heavy pot means it’s still got plenty of moisture.
- Water Slowly and Evenly: When you do water, pour it gently over the soil surface, trying to wet all areas. Water until you get a bit of runoff from the bottom of the pot – this ensures the soil is fully saturated. Then stop; don’t keep dousing the plant. Let the excess drain away (make sure to empty saucers, so the pot isn’t sitting in stagnant water).
- Avoid Overwatering: It’s easy to love your plants too much. Overwatering is essentially giving water again before the soil has had a chance to dry out a bit. Cannabis roots need oxygen; if they’re constantly soaked, they can’t breathe and may rot. Symptoms of overwatering include drooping leaves (that look kinda “fat” and heavy), and the plant can actually mimic signs of nutrient deficiencies because roots aren’t functioning well. If in doubt, it’s often better to err on the side of slightly underwatering than overwatering – you can always add water, but it’s hard to take it back.
As for water quality, if you can use filtered or distilled water that’s great, but many growers use plain tap water successfully. It’s a good idea to let tap water sit out overnight so chlorine can evaporate, especially if your local water is heavily treated. Also, note that cannabis prefers a slight acidity in the root zone (pH ~6.0–6.5 for soil). Extremely high or low pH in your water can lock out nutrients. You can test pH with inexpensive kits, but if this feels too technical, don’t stress – many soil grows do fine without minute adjustments, especially if using organic nutrients.

Feeding Your Plants: Quality soil often contains some nutrients to start with (some bags labeled “hot” soil have enough for the first few weeks). As your plant grows, it will use up nutrients, and you’ll likely need to feed it with fertilizer to keep it healthy. There are endless cannabis nutrient products out there – but for beginners, a simple two-part nutrient (one for grow, one for bloom) or an all-in-one organic soil amendment will do the job. Here are basic guidelines:
- During the vegetative stage, cannabis mainly craves Nitrogen (N) (along with smaller amounts of phosphorus and potassium). Most “Grow” nutrients are high in N. They help the plant put out lots of green leaves and branches.
- During flowering stage, the needs flip – the plant uses more Phosphorus (P) and Potassium (K) to build big buds, and less nitrogen. That’s why “Bloom” nutrients have a higher P and K content.
When feeding, less is more to start. It’s wise to begin at half the recommended dose on the fertilizer bottle to see how your plants respond. Overfeeding can lead to “nutrient burn” (tips of leaves turn yellow/brown and crispy). If you notice dark green leaves, burnt tips, or other signs of excess, dial back. It’s easier to fix a slight deficiency (just add a bit more nutrients) than to fix an overfeed. Many growers follow a simple schedule like: feed-water-water, meaning they feed nutrients one watering, then give plain water the next two, then repeat. This prevents buildup of salts in the soil.
For those using organic methods, you might mix compost, worm castings, or other organic amendments into your soil. In that case, you may not need liquid feeding as often – the plant will take nutrients from the soil as it breaks down. Keep an eye on your plant’s leaves: if they start to pale (light green or yellow) in the lower leaves, it could be a nitrogen deficiency and time to feed a bit more.
Finally, always remember to introduce changes gradually. Whether it’s adjusting pH, increasing light, or upping nutrient levels – make small changes and observe. Cannabis plants often bounce back from minor issues if caught early, but drastic swings can shock them. The goal is for you to learn and gain confidence as you care for your plants.
Avoiding Common Mistakes: Tips from the Cannabiz Community
Even with the best guidance, every new grower hits a few bumps in the road – and that’s okay! The key is learning from them. Here are some common mistakes beginners make (many of which Cannabiz Seed’s founders experienced firsthand) and how to avoid them:
- Overwatering (or Underwatering): As discussed, too much love can drown your plant. On the flip side, forgetting to water and letting your plant completely dry out will cause wilting and nutrient lockout. Tip: Develop a watering rhythm by checking your plants daily. Soon you’ll recognize the “feel” of a pot that needs water. When in doubt, wait a day – droopy from thirst can recover quickly with watering, but roots rotted from overwatering are a bigger problem.
- Too Many Nutrients, Too Soon: Eager first-timers sometimes start pouring in fertilizer from week one. Young seedlings actually need very little nutrition at first; they live off the seed’s energy and what’s in the soil. Overfeeding can burn them. Tip: Hold off on nutrients until you see the first signs that they’re needed (pale leaves after the first couple sets of true leaves), or until about 2–3 weeks in if using a neutral medium. When you do start feeding, begin at half-strength.
- Inadequate Light: That spare 10-watt LED bulb in your desk lamp isn’t going to cut it for growing decent cannabis. Insufficient light leads to tall, weak plants with tiny yields. Tip: Invest in the best light your budget allows – it truly pays off. Position it correctly (not too far, not too close) and adjust as plants grow. If growing outdoors, make sure your spot actually gets direct sun; ambient light or shade will lead to disappointing results.
- Lack of Airflow and Ventilation: Growing in a closet with the door always shut can create heat and humidity buildup, and invites mold or pests. Tip: Ensure your grow area has fresh air exchange. For tents, use an exhaust fan. For open rooms, a simple fan plus leaving a door ajar or window open (if smell isn’t an issue) can work. Strong stems and pest prevention are bonuses of good airflow.
- Not Monitoring Your Plants Regularly: Cannabis can’t talk, but it sure does communicate through its leaves and posture. Many issues, like yellowing leaves or spots (could indicate nutrient issues or pests), curled leaves (possible overwatering or heat stress), etc., start subtly. Tip: Look at your plants every day, even for a few minutes. Get to know what “happy” looks like (perky leaves, vibrant color). This way, you’ll catch problems early. For example, yellowing leaves are one of the biggest challenges new growers face– often indicating something off in nutrients or pH. If you spot it early, you can correct course (perhaps add nitrogen, or adjust pH) and avoid poor yields.
- Ignoring the Grow Environment: Some beginners fixate on fancy nutrients but ignore basics like temperature or pH. The truth is, environment is at least half the game. If your room is routinely dropping to 50°F (10°C) at night or spiking to 95°F (35°C) in the day, the plant will be stressed no matter what else you do. Same with pH – if it’s way out of range, the plant can’t absorb nutrients even if they’re present (a phenomenon called “nutrient lockout”). Tip: Invest in a simple hygrometer/thermometer to monitor conditions. Keep a log of your temperature highs and lows and humidity. This sounds like extra work, but it can be as simple as a quick note in your phone. It helps you see patterns and make adjustments. Use pH strips or a meter to occasionally check your water/nutrient solution’s pH – this can prevent mysterious deficiencies.
- Being Impatient: We get it – you’re excited to harvest your own buds! But rushing things can ruin months of hard work. Common impatience mistakes include harvesting too early (buds may look decent at 6 weeks of flowering, but most strains need 8+ weeks for potency and weight) or not drying/curing properly (which can lead to harsh smoke). Tip: Follow the strain’s recommended timelines, and when in doubt, give the plant a bit more time. Trichomes (the crystals on buds) are a great indicator of readiness – many beginners harvest when most trichomes are milky white with a few ambers for a nice effect. When it comes to drying and curing, ensure you do it in a cool, dark place with some airflow. It’s worth the extra week or two to unlock the best flavor and potency.
Conclusion: Your Growing Journey Begins
Starting your cannabis grow from seed is a journey – one that will test your patience, pique your curiosity, and ultimately reward you with the pride of saying “I grew that!” By focusing on the basics – quality seeds, a good environment, proper watering, sufficient lighting, and staying alert to your plants’ needs – you set a strong foundation for success. Remember, even the legendary growers had to start somewhere.
So, take a deep breath and dive in with enthusiasm. Germinate those seeds, tend to your plants daily, and don’t be afraid to ask for help when you need it. Growing cannabis is as much an art as a science, and you’ll develop your own green thumb style along the way. With each day, you’ll see your seedlings stretch toward the light, new leaves unfurling – tangible proof that you’re doing something right. Few hobbies are as empowering and satisfying as nurturing a plant from a tiny seed to a flowering beauty.Cannabiz Seed’s team and community are excited to have you as part of the family. As you embark on your beginner’s growth, keep the Cannabiz philosophy in mind: passion, quality, and innovation united with education and support. We’re all learning and growing (literally) together in this ever-evolving cannabis journey. Now go ahead – get those hands dirty, enjoy the process, and happy growing!